Bandwidth Sharing Setup
Introduction
This how-to explains how to set up bandwidth sharing with client machines (PC) and the internet. Typical application may include broadband sharing between flat mates or family members.
Setup Summary
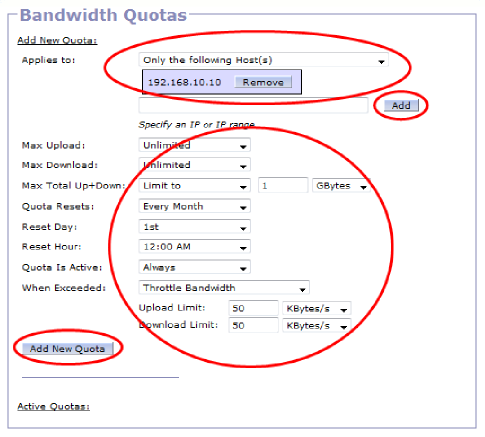
Restrictions/Quotas are assigned to a computer and not by username and password. Any person who has access to this computer will have access to the internet.
Setup Summary Steps
-
- Enter Gargoyle configuration menu
- Setup router as an Access Point (AP)
Prerequisite
- Your gargoyle router needs to be configured correctly as an AP (Access Point).
- Your router should to be plugged into a DSL routers or internet source (DHCP server) with the use of an Ethernet cable. If your DSL router has wireless you may want to disable it.
Wireless Connection
Make a wireless connection between client PC (Notebook or Desktop computer) and a gargoyle router.
This will enable configuration of gargoyle through a web browser.
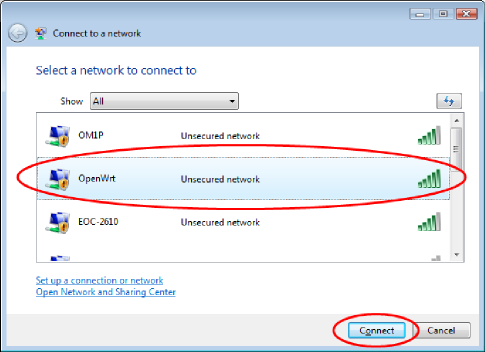
Windows Vista example
Start » Connect To
The default SSID for a Gargoyle AP is “OpenWrt” but this could have been changed.
Configure router
Web browser connection
- Once a wireless connection has been made type in the IP address of the router in a web browser, default 192.168.1.1
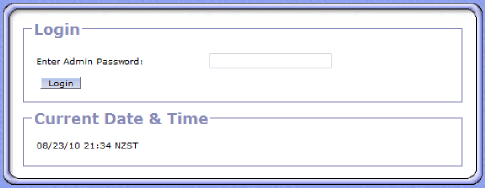
Enter Password
- Enter password (the default is “password” )
The default IP address is 192.168.1.1 (Note: If your DHCP router (DSL broadband router) uses the IP subnet of 192.168.1.x it may conflict with gargoyle and in this case you should change one of the routers to a different subnet)
Connect all client PC’s
At this point to make life a bit easier I would suggest connecting all client PC's that require controlled internet access to your gargoyle router through a wireless connection.
In order for client machines (PC's) to connect to the internet an IP address must be used as an identifier. Usually a DHCP server/router will give out client IP address using a random IP address from an address pool but because we want control the bandwidth of a clients PC we must give the client the same IP address each time a network connection is made. Gargoyle does this by checking the client PC's MAC address then assigning the same IP address.
DHCP Setup
IP Address Pool
Assigned Static IP address
The rule listed below states that when the PC named “AMD6000” connects it will be assigned an IP address of 192.168.10.10
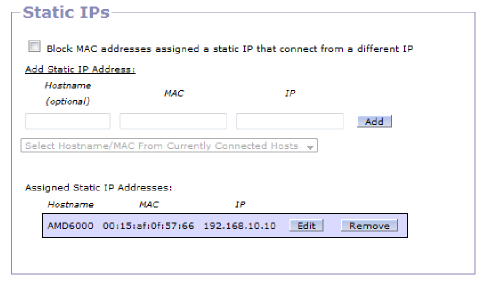
Assign Static IP
To assign a static IP address to a client PC first make a wireless connection. Once a connection has been made refresh your browser and a drop down box should appear with the new client. With your mouse select the new client, this will then move the client details to the “add box”.
Manually enter the the new client IP address. Make sure you select an IP address in the same subnet but not in the DHCP server pool. This example the subnet is 192.168.10.x. The DHCP server pool is x.x.x.100-x.x.x.250.
In this example suitable fixed IP address would be 192.168.10.2 to 192.168.10.99
Select Client
Add IP address
So manually add IP address e.g. 192.168.10.11
listed clients with Fixed IP
Assigned static IP address
Access Restrictions Setup
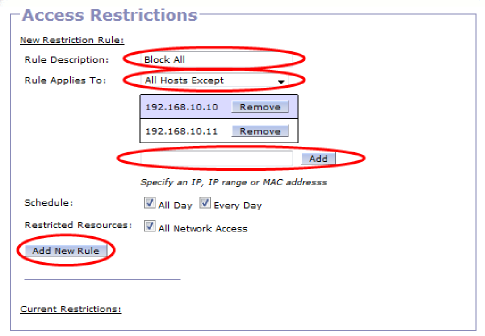
We need to block all internet access all PC's except ones with quotas.
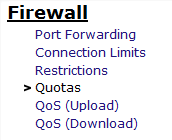
Firewall » Restrictions
- Add Rule Name -
Use any Name - Set Rule Applies to -
Suggest “All hosts except” - Add any static IP address that require access -
Click “Add” - Add new rule -
Click “Add new rule” - Save -
Click “Save Changes”


