Configuring Routers With One Ethernet Port
Introduction
Some wireless routers such as the MR3201A and the original La Fonera 2200 have only one ethernet port. This guide is meant to help users configure a router like this.
Initial Configuration
When you first install Gargoyle firmware, wireless connectivity is disabled for security reasons. Therefore you will need to connect the router to your computer via an ethernet cable:
At this point you will only be able to access the router, not the internet. Since the router has no network connection yet, the router's date will not yet be updated to the correct time. This is normal.
To access the router for the first time, connect your PC as shown, and navigate to 192.168.1.1. To login for the first time, use the password “password”:
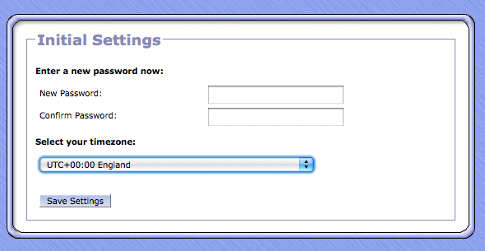
You will then be prompted to change the password to something more secure, and to set your timezone:
As already noted, the current time displayed will be incorrect until you complete your setup and connect to the internet.
After setting your password and timezone you will be redirected to the Connection/Basic page, where you can configure your network connection. However, before proceeding you need to decide how you want to use your router. You have two options:
Configuring A Wireless Access Point
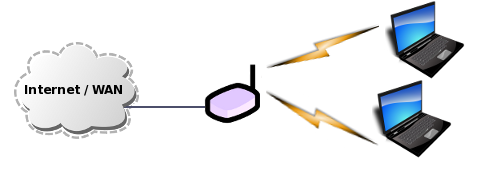
Configuring the router as an access point allows multiple computers to wirelessly share a single wired connection:
The best way to do this is to first configure the router so that it is possible to connect wirelessly. Then it will be possible to disconnect the wired connection, connect wirelessly, and reconfigure the ethernet port so that it connects to the internet.
Step 1 – Enable Wireless
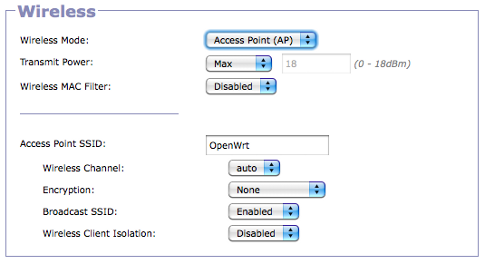
For now, don't change any of the settins in the Device Configuration, Internet/Wan, or LAN sections. Scroll down to the Wireless settings at the bottom of the Connection/Basic Page. Wireless Mode will initially be set to Disabled.
Select Access Point (AP) from the list, and you should now see this:
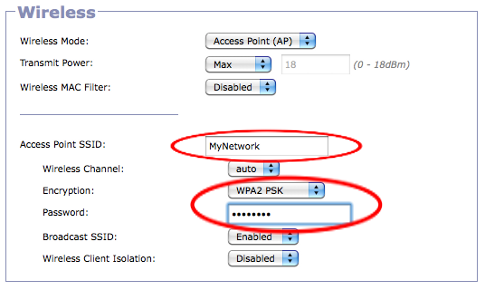
Replace the Access Point SSID (currently “OpenWrt”) with the name you want to give your wireless network.
Right now you have not configured any wireless encryption. In order to secure your network select “WPA2 PSK” from the list of Encryption types, and type a password in the box that appears. The password must be at least 8 characters long. The fields that should now be changed are highlighted in red in the image below:
Now hit the big blue Save Changes button at the bottom of the screen, circled in red in this figure:
The screen will darken, and you will need to wait for a little while while the changes are applied.
Step 2 – Connect Wirelessly
It should now be possible to connect wirelessly to the router. Disconnect the ethernet cord from your computer. Then use your computer to connect to the wireless network with the name you selected (“MyNetwork” in the figure above). You will be prompted for the wireless password you just set.
Note that while you will be able to connect to this network, you still will not have internet access.
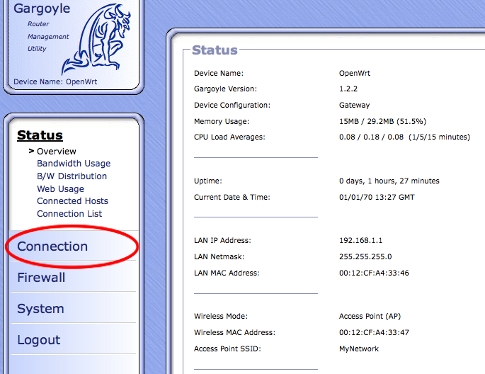
Navigate to 192.168.1.1 in your browser and login again. To return to the Connection/Basic page to finish your configuration, select the “Connection” button on the main menu at the far left side.
Step 3 – Configure your Internet Connection
Now that you can connect wirelessly to the router, it's time to reconfigure the ethernet port to access the internet.
Before proceeding make sure there are no cables currently connected to the router's ethernet port.
Under the WAN section at the top, the Ethernet Port Connects To setting should currently be set to LAN. Change this to WAN:
Finally, alter the Connect Via setting in the WAN section to be DHCP (Wired) if you are connecting via a cable modem, or PPPoE (Wired) if you are connecting via DSL. If you are connecting via DSL/PPPoE you will need to enter the details provided by your internet service provider, while you don't need to specify anything further if you are connecting via Cable Modem/DHCP:
If your internet is provided through a DSL router with the DHCP server enabled (this is the default) you will need to check the subnet does not conflict the gargoyle router subnet. The default Gargoyle subnet is 192.168.1.x which is the same as many DSL routers. They must not be the same. Log into your DSL router to find which subnet address it is using. (see router user manual)
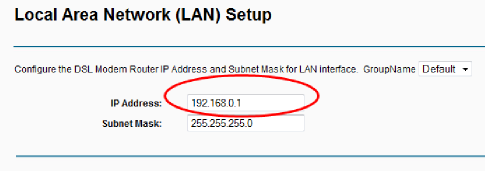 The two examples shown do not conflict because one is 192.168.0.x and the other is 192.168.1.x but if they were both 192.168.1.x you would need to change one of them.
For example we could change the Gargoyle “router IP” to something like 192.168.10.1 if the DSL router was 192.168.1.x
Hit the big Save Changes button again, and immediately plug the ethernet cable from your cable modem into the router.
After waiting for a few moments while the settings are saved, you should now be connected to the internet.
Configuring Wireless Client Mode
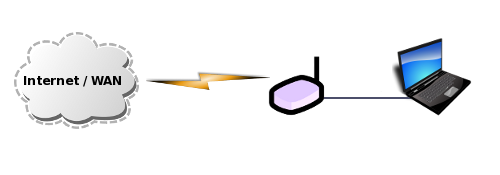
A router in wireless client mode allows the connection of a wired computer to an existing wireless network:
One thing to be aware of is that these instructions describe how to configure routed client mode. This means that while all computers will be able to access the internet, computers that are not behind the router will not be able to communicate directly with any computer that is behind it. This issue can be fixed by configuring the router as a wireless bridge but that topic is beyond the scope of this tutorial.
Step 1 – Configure WAN Settings
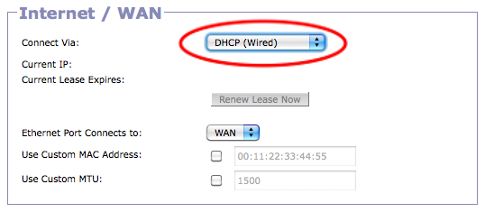
Locate the Internet/WAN section at the top of the page, and select DHCP (Wireless) from the Connect Via list (circled in red here).
Step 2 – Configure LAN Settings (Optional)
Scroll down to the LAN section. You don't have to change anything here, but you may want to consider changing the router's IP from 192.168.1.1 to something like 192.168.5.1. The reason for this is that many wireless routers use the IP of 192.168.1.1, and if the wireless AP you are connecting to is in the same subnet, this configuration will not work. To avoid this problem, you can change the router's IP here. However, if you do this you will access the router at this IP instead of 192.168.1.1 and you also may need to reboot your computer at the end of this tutorial before you can connect to the internet.
Step 3 – Configure Wireless Settings
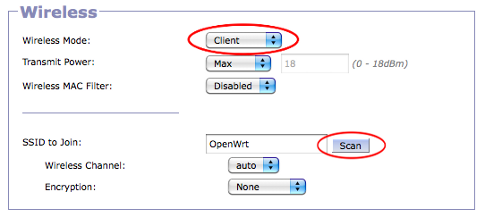
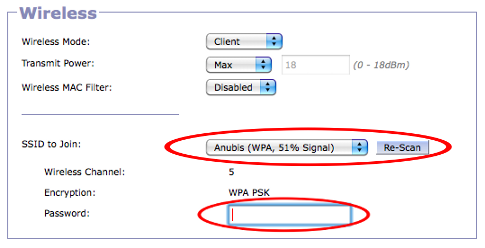
Locate the wireless controls at the bottom of the page. Select Client from the Wireless Mode list. Then click on the Scan button to locate wireless network that you can connect to. The scan will take several moments.
Select the wireless network you wish to join from the SSID To Join list. If the network is encrypted you will need to specify the password in order to connect.
Hit the big blue Save Changes button to save your configuration.
Wait for a few moments. If you changed the router's IP in the LAN section above, you may need to reboot your computer. After that is done, you should be connected to the internet.


