Getting Started
Before you start
If you don't have a router with Gargoyle pre-installed, you will need to install Gargoyle, via one of the firmware images.
Logging In
Immediately after installation you will be able to connect an ethernet cable to your computer and access the router at IP 192.168.1.1. Just type this IP into the address bar of your web browser and hit enter.
If you wish to access the router via a secure connection you can enter https://192.168.1.1 into your address bar to ensure the connection is encrypted. If you choose to connect via a secure connection your browser will prompt you to accept the security certificate from the router (hit yes), before continuing.
You may also login to the router via the command line using SSH, as the root user. Unlike default OpenWrt firmware, SSH is active by default, and telnet is disabled. The password for the web login and root SSH login are always identical, and default to “password”
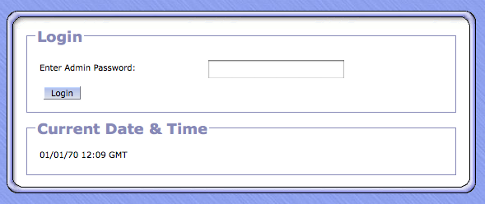
When you first access the router via the web interface you will be asked to login at this screen:
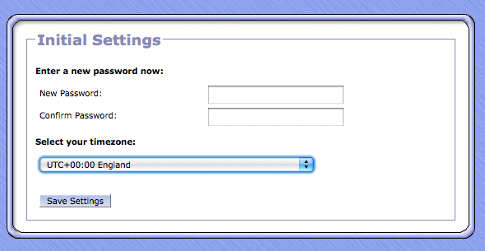
Since this is the first login, just type “password” and hit enter. This will bring you to a new screen which prompts you to set a new root password:
Choose a new password, enter it twice and hit hit the set password button to continue. This step is only required the first time you login – you won't be prompted to change passwords after this. Also, you will need to select your timezone so the router's time matches your local time.
Configure Your Network Connection
This brings you to the Connection / Basic configuration page, where you can control how (or if) your router should connect to the internet or the rest of your network.
At the top of this page you will see the Device Configuration control:
For most purposes the device should be configured as a gateway, the default. Wireless bridging is possible in the latest versions of Gargoyle, but this is a more advanced feature and should only be configured by users who know what they are doing.
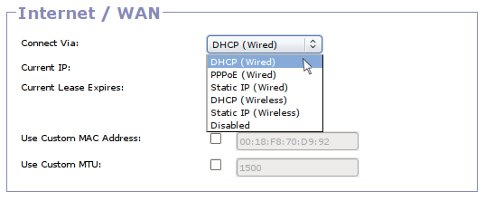
Below this are the WAN configuration controls:
Here you specify how you wish to connect to the internet or an external network. Select the connection method from the “Connect via” drop-down menu as shown. You may connect using DHCP (the default, choose this if you are unsure), a static IP, or PPPOE (for DSL users). If you wish to connect to an external network via a wireless connection select either the DHCP (wireless) or Static IP (wireless) options. The necessary controls will be displayed after you make your selection.
Next is the LAN configuration controls:
Here you can set your Router's local IP and subnet mask. For most purposes the defaults are adequate – unless you anticipate having more than 255 users on your LAN or connecting to an external network with the 192.168.1.0/24 subnet, there is no reason to change these settings. If you want, you may also specify custom DNS servers for the network to use (e.g. if you wish to make use of OpenDns ), but for most people leaving this setting turned off will be fine.
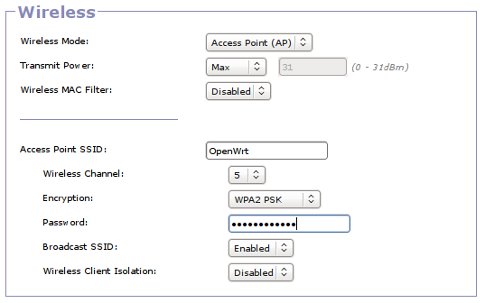
At the bottom, there are controls to configure your wireless settings:
Typically, you will want to set the wireless mode to Access Point (AP). This means that computers with wireless network adapters can connect to it. The “Access Point SSID“ indicates the name of your Access Point – computers connecting via a wireless interface will need to specify this. If you disable the “Broadcast SSID“ option your SSID will not be visible to computers scanning for wireless networks to connect to, but can still be joined by manually entering the SSID. If you enable the “Isolate Wireless Clients“ option, wireless clients will not be able to connect directly to each other, only to the router and to the internet.
It is also usually a good idea to encrypt your wireless network, otherwise anyone walking past can connect. The WEP encryption algorithm is supported, but be aware that this encryption is relatively weak and can be hacked fairly easily by someone who knows what they are doing. It is better to use either WPA PSK or WPA2 PSK encryption which are more robust. Also, these modes of encryption allow you to set a password, as opposed to a hex key, for a password which is easier to remember. You may also wish to allow only clients with specific MAC (hardware) addresses to connect. You can specifiy a list of allowed (or excluded) MACs by enabling the “Wireless MAC Filter” option, and specifying the MAC addresses in the interface that becomes visible. It is not recommended that you use a MAC filtering policy alone to secure your network – MAC addresses are very easily spoofed.
At the very bottom of the page there is a “Save Changes” button and a “Reset” button. You will find similar buttons at the bottom of most pages that are part of Gargoyle. The “Reset” button will reset your selections on that page to whatever they were the last time they were saved. When you click the “Save Changes” button, your current changes will be applied to the router and your old settings will be lost. Several pages, such as the QoS settings, allow you to open up a separate editor window which will allow you to “Apply Changes” after you're done editing. Be aware that these changes applied by the editor will NOT be saved until you click the “Save Changes” button at the bottom of the original page.
While this covers basic configuration of the router, there are a large number of more advanced features available. Below is a list of all the pages that are part of Gargoyle, where they can be found, and a brief summary of what each does. The interface should be fairly intuitive, but should any question arise feel free to post in the forum or to use the Contact button on the left to send a message to one of the developers.
Summary of Gargoyle Interface Layout
Status
- Overview – Lists current status of the router including uptime, memory usage and IPs assigned to the different interfaces.
- Bandwidth Usage – An interface for monitoring total bandwidth used, as well as bandwidth used by Static IPs and Qos Service Classes over different time frames.
- Web Usage – An interface for configuring and monitoring web sites visited, inactive by default
- Quota Usage – Only present if Bandwidth Quotas are active, displays quota use by IP, updated in real time
- QoS Distribution – Only present if QoS is active, displays current breakdown of different QoS classes using a pie chart.
- Current Connections – Displays current connections taking place on the network
Connection
- Basic – Configures the wireless connection and how the router connects to the internet, as described above
- DHCP – Configures the DHCP server and allows assignment of static IP addresses
- Dynamic DNS – Configures updates of dynamic DNS services that allow you to have a static domain name even if your IP changes frequently.
- Routing – Configures static routes
Firewall
- Port Forwarding – Forward either a single port or a range of ports, also has controls for enabling/disabling UPnP.
- Connection Limits – Set maximum allowed connections and connection timeouts for idle connections
- Restrictions – Place restrictions on network usage by resticting ips, ports, protocols and website urls
- Quotas – Set upload and download bandwidth quotas for local hosts
- QoS (Upload) – Quality of Service settings that allow you to allocate available bandwidth for outbound connections.
- QoS (Download) – Quality of Service settings that allow you to allocate available bandwidth for inbound connections, this is often referred to as traffic shaping
System
- Router Access – Configures what ports web server/ssh server should listen on and whether they should be accessible remotely. Also provides an interface to change the root password, as described above.
- Identification – Sets the name of the router
- Time – Configure NTP updates to automatically set the time on the router.
- Backup / Restore – Backup current router settings or restore settings from a previous backup
- Update Firmware – Install a new firmware image
- Reboot – Reboot the router
- About – Gargoyle contributers and license information
Logout
- Logout of the router immediately.


